Hobart meat slicers are renowned for their durability and efficiency in the culinary world. However, like any other mechanical equipment, the meat slicer requires maintenance or repairs from time to time. One common task that might need attention is the removal of the motor.
Whether you’re replacing a malfunctioning motor or conducting routine maintenance, understanding the steps involved is crucial. we will walk you through the process of removing the Hobart meat slicer motor in a comprehensive and easy-to-follow manner.
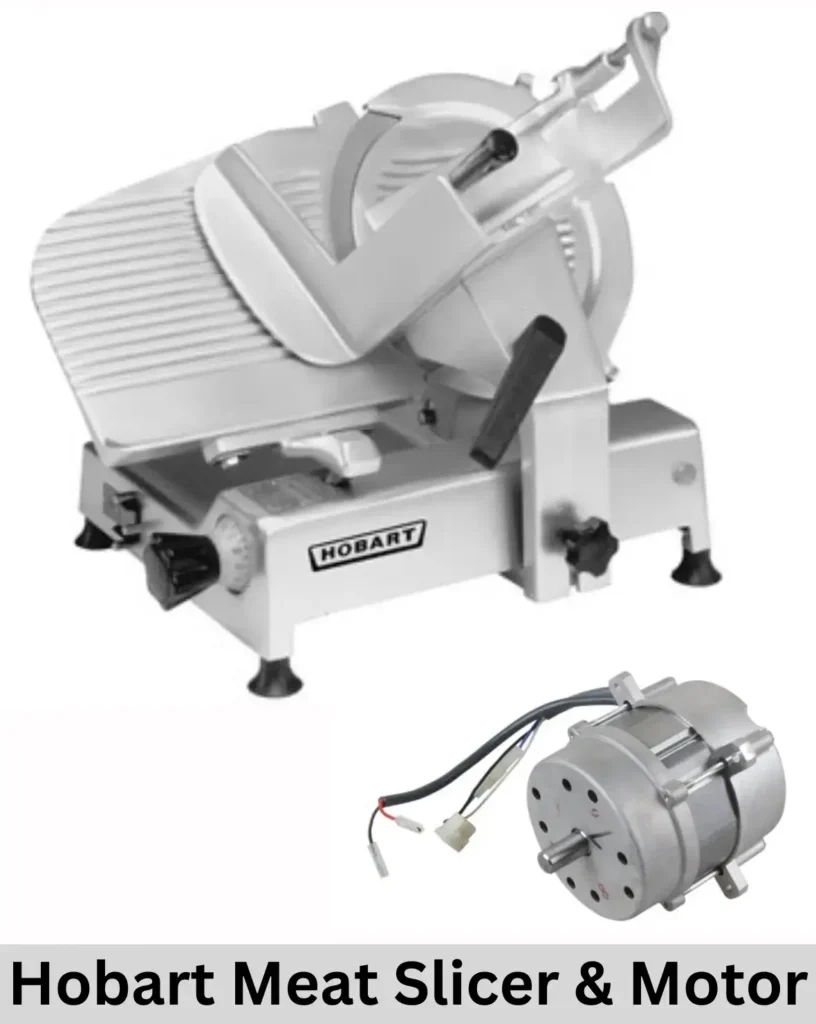
How to Remove Hobart Slicer Motor: Key Steps
Safety First:
Before diving into any maintenance task, safety should be the top priority. Ensure that the meat slicer is unplugged from the power cord source to prevent any accidents. Additionally, wear appropriate personal protective equipment such as gloves and safety glasses to safeguard yourself from potential hazards.
Gather Your Lubricate Tools:
Having the right tools for the job is essential for meat slicers. Make sure you have the following tools on hand before starting the process:
- Screwdriver set (Phillips and flathead)
- Adjustable wrench
- Allen wrench set
- Nut driver
- Work gloves
- Safety glasses
Refer to the User Manual:
Consult the user manual that came with your Hobart meat slicer. The manual is a valuable resource that provides specific instructions and diagrams tailored to your model. It will give you insights into the location of screws, bolts, and other components that need attention during the motor removal process.
Disconnect the Power Source:
Ensure often must a meat slicer is completely powered off and unplugged from the electrical outlet. This is a crucial safety step to prevent accidental starts while you are working on the equipment.
Remove the Meat Slicer Blade:
Begin by removing the slicer’s blade. Use an appropriate wrench to loosen the blade cover and carefully lift the meat slicer blade out of its position. Set the blade aside in a safe place.
Detach the Hobart Slicer Components:
Depending blade on a Hobart meat slicer model, you may need to remove the blade and additional components to access the motor. Common components to detach include the product removing the tray, carriage, and sharpening. Follow the user manual instructions for your specific model to complete this step.
Locate and Remove Meat Slicer Motor:
The motor is typically housed in a casing secured by screws. Use the appropriate screwdriver to remove the screws and detach the motor housing. Keep track of the screws as you’ll need them later to reassemble the slicer.
Disconnect Motor Wiring:
Once the motor housing is removable, locate the wiring connected to the motor. Carefully disconnect the wires by following the color coding or markings. Take note of the wire configuration for proper reconnection later.
Remove Mounting Bolts:
The motor is secured to the slicer with mounting bolts. Use the appropriate wrench or nut driver to loosen and remove these bolts. Keep the bolts in a safe place, as they will be needed for reinstallation.
Carefully Extract the Motor:
With the mounting bolts removed and the wiring disconnected, carefully lift the motor out of its position. If the motor seems stuck, gently wiggle it to release any remaining tension.
Inspect for Damage:
They carefully check the motor for any signs of damage or wear. If you are replacing the motor, compare the new motor with the old one to ensure they match in specifications.
Important to Cleaning and Maintenance:
While the motor is out, take the time to clean the meat slicer and the surrounding components and perform any necessary maintenance tasks. This could include lubricating moving parts of the slicer, checking for loose or damaged belts, and ensuring all components are in good condition.
Reassembly Hobart Meat Slicer:
To reassemble the meat slicer, follow the steps in reverse order. Connect the new or repaired motor, secure it with mounting bolts, reconnect the wiring, and attach the motor housing. Tighten all screws and bolts securely to ensure the slicer’s proper functioning.
Blade Reinstallation:
Carefully place the blade back onto the slicer and secure it with the appropriate wrench. Ensure that the blade is properly aligned and tightened according to the manufacturer’s specifications.
Test the Meat Slicer:
Before putting the meat slicer back into regular use, plug it in and conduct a test run. Ensure that the motor operates smoothly and that there are no unusual sounds or vibrations. If everything checks out, your Hobart meat slicer is ready to resume its slicing duties.
Conclusion of Hobart Meat Slicer Motor:
Removing the motor from your Hobart meat slicer might seem like a daunting task, but with the right tools, safety precautions, and a systematic approach, it becomes a manageable process.
Always refer to the user manual specific to your model for accurate instructions, and don’t hesitate to seek professional assistance if needed. Regular maintenance and timely motor replacements will extend the life of your meat slicer, ensuring it continues to deliver efficient and precise slicing in your kitchen.
FAQs About how to remove the hobart slicer motor
Why would I need to remove the motor from my Hobart meat slicer?
There are various reasons, including motor replacement due to malfunction, routine maintenance, or upgrading to a more powerful motor.
Can I remove the motor without consulting the user manual?
It is highly recommended to consult the user manual for your specific Hobart meat slicer model. The operating manual provides crucial insights into the location of components and ensures that the slicer has a safe and accurate removal thorough cleaning process.
What safety precautions should I take before removing the motor?
Always disconnect the slicer from the power source, wear appropriate personal protective equipment, and follow the safety guidelines outlined in the user manual.
How often should I perform maintenance on the meat slicer motor?
Regular maintenance is essential for optimal performance. The frequency depends on usage, but it’s advisable to inspect and thoroughly clean your meat slicer motor at least once every few months.
Can I use any motor as a replacement for my Hobart meat slicer?
No, it’s crucial to use a motor that meets the specifications outlined in the user manual. Using a meat slicer incompatible motor may result in performance issues or damage to the slicer.
What if I encounter difficulties during reassembly?
If you face challenges while reassembly, refer to the user manual or seek assistance from a professional technician to ensure properly clean configuration and functionality.
Are there any signs that indicate my meat slicer motor needs replacement?
Signs include unusual noises, decreased performance, or visible damage during inspection. If these issues persist, it may be time to consider motor replacement or professional servicing.