Maintaining kitchen equipment is crucial for ensuring efficiency, safety, and longevity in any commercial or home kitchen. One such essential piece of equipment is the Hobart meat slicer, renowned for its precision and durability.
Proper servicing of your Hobart meat slicer not only keeps it running smoothly but also reduces the risk of accidents and breakdowns.
How to Service Hobart meat slicer? In this comprehensive guide, we’ll walk you through the step-by-step process of servicing your Hobart meat slicer, from regular maintenance to troubleshooting common issues.
How to Service Hobart Meat Slicer Here is Step by step Guide.
Understanding Hobart Meat Slicer Parts:
Before diving into the servicing process, it’s essential to understand the basic components of your Hobart meat slicer. While specific models may vary slightly, most Hobart slicers consist of the following key parts:

- Blade: The blade is responsible for cutting meat or other food items. It should be sharp and properly aligned for efficient slicing.
- Sharpener: Some Hobart slicers come equipped with a built-in sharpener to maintain blade sharpness.
- Carriage: The carriage holds the food item in place during slicing and can usually be adjusted for thickness.
- Gauge Plate: The gauge plate determines the thickness of the slices.
- On/Off Switch: Controls the power supply to the slicer.
- Safety Features: These include features like blade guards and emergency stop buttons to ensure user safety.
Now that you’re familiar with the basic components let’s proceed to the servicing steps.
Step 1: Cleaning a Hobart Meat Slicer:

Regular cleaning is essential for keeping your Hobart meat slicer sanitary and in optimal condition. Follow these steps for thorough cleaning:
- Unplug the slicer: Before starting any cleaning or maintenance procedures, always unplug the slicer to prevent accidents.
- Disassemble the slicer: Remove the blade, carriage, gauge plate, and any other removable parts according to the manufacturer’s instructions.
- Wash with warm, soapy water: Use a mild detergent to clean each component thoroughly, ensuring that all food residue is removed.
- Rinse and dry: Rinse the components with clean water and allow them to air dry completely before reassembling.
- Sanitize: After cleaning, sanitize the slicer components using a food-safe sanitizer to kill any remaining bacteria.
- Wipe down the exterior: Use a damp cloth to clean the exterior surfaces of the slicer, including the base and controls.
- Reassemble the slicer: Once all the components are clean and dry, reassemble the slicer following the manufacturer’s instructions.
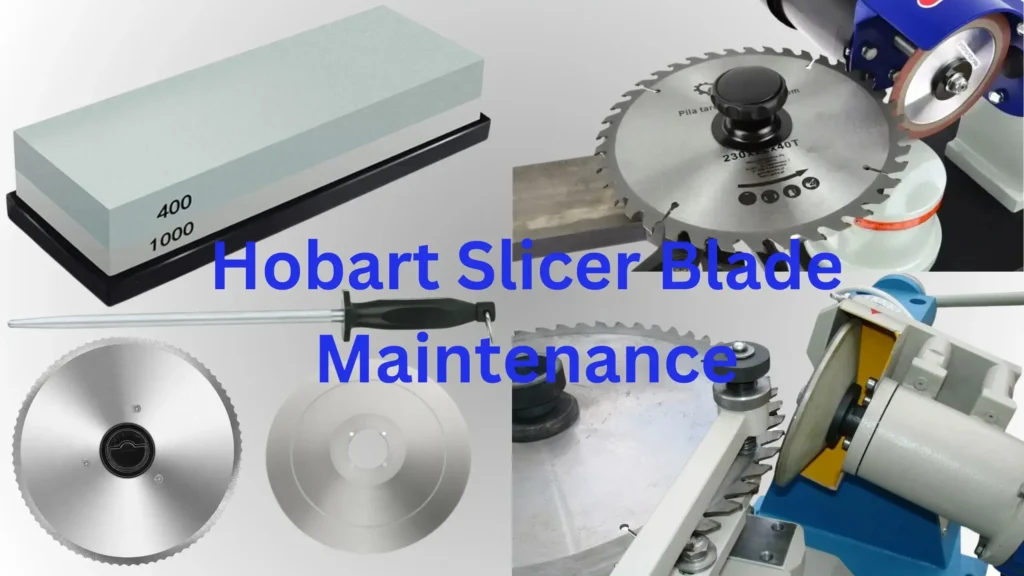
Step 2: Hobart Slicer Blade Maintenance:

A sharp blade is essential for precise slicing. Follow these steps to maintain the blade:
- Sharpen the blade: If your slicer has a built-in sharpener, use it according to the manufacturer’s instructions. If not, you can manually sharpen the blade using a sharpening stone or honing slide rod.
- Check for alignment: Ensure that the blade is properly aligned with the carriage and gauge plate to prevent uneven slicing.
- Lubricate moving parts: Apply food-grade lubricant to any moving Hobart slicer parts, such as the blade and carriage, to reduce friction and prolong the lifespan of the slicer.
Step 3: Adjustment and Calibration:
Periodically calibrating and adjusting your Hobart meat slicer ensures consistent slicing thickness and performance. Follow these steps:
- Check slicing thickness: Use a caliper or ruler to measure the thickness of the slices produced by the slicer. Adjust the gauge plate if necessary to achieve the desired thickness.
- Check carriage tension: Ensure that the carriage moves smoothly along the track and adjust the tension if it feels loose or tight.
- Test safety features: Verify that all safety features, such as blade guards and emergency stop buttons, are functioning correctly.
Step 4: Troubleshooting Common Issues:
Even with regular maintenance, you may encounter occasional issues with your Hobart meat slicer. We tell you some common problems of meat slicer:
- Blade dullness: If the blade becomes dull despite regular sharpening, it may need to be replaced. Contact the manufacturer for a replacement blade.
- Uneven slicing: Check for blade alignment and adjust as needed. Also, ensure that the food item is properly centered on the carriage during slicing.
- Motor issues: If the slicer motor fails to start or makes unusual noises, it may indicate a motor problem. Contact a qualified technician for meat slicer repairs.
- Safety feature malfunctions: If any safety features are not working correctly, discontinue the use of the slicer until the issue is resolved to prevent accidents.
Safety Tips for Hobart Meat Slicer during Service:
Safety is paramount when servicing a Hobart meat slicer to prevent accidents and ensure the well-being of kitchen staff. By prioritizing safety and following these tips, you can maintain a safe working environment and prevent accidents when servicing your Hobart meat slicer.
Here are essential safety tips to keep in mind.
- Unplug Before Servicing: Always disconnect the slicer from its power source before attempting any cleaning, maintenance, or adjustments. This simple step prevents accidental start-ups, which could result in severe injuries.
- Use Personal Protective Equipment (PPE): Wear appropriate PPE, such as cut-resistant gloves and safety goggles, when handling the blade or performing maintenance tasks. These items provide an extra layer of protection against cuts and debris.
- Handle Blades with Care: The blade of a meat slicer is sharp and can cause serious injuries if mishandled. Exercise caution when removing, sharpening, or reinstalling the blade, and always follow the proper procedures outlined in the manufacturer’s manual.
- Mind Moving Parts: Be mindful of moving parts, such as the carriage and blade, during servicing. Keep fingers and hands away from these areas to avoid getting caught or pinched.
- Proper Training: Ensure that only trained and authorized personnel operate or service the meat slicer. Proper training reduces the risk of accidents and ensures that individuals understand how to safely use the equipment.
- Regular Inspections: Conduct regular inspections of the slicer’s components, including the blade, carriage, and safety features. Look for signs of wear, damage, or misalignment, and address any issues promptly to prevent accidents.
- Emergency Procedures: Familiarize yourself and your team with emergency procedures in case of accidents or malfunctions. Know the location of emergency stop buttons and how to quickly shut off power to the slicer if needed.
- Follow Manufacturer’s Guidelines: Adhere to the manufacturer’s guidelines and recommendations for servicing and maintenance. These instructions are designed to ensure safety and optimal performance.
Conclusion of How to Service Hobart Meat Slicer:
Servicing your Hobart meat slicer is essential for maintaining its performance, safety, and longevity. By following the steps outlined in this guide, you can ensure that your slicer remains in top condition and continues to provide precise, efficient slicing for years to come.
Remember to adhere to the manufacturer’s instructions and safety guidelines at all times, and never hesitate to seek professional assistance if you encounter any issues beyond your expertise. With proper care and maintenance, your Hobart meat slicer will be a valuable asset in your kitchen for many years.
Frequently Asked Questions About How to Service Hobart Meat Slicer
How often should I clean my Hobart meat slicer?
It’s recommended to clean your Hobart meat slicer after each use to prevent food buildup and maintain sanitation. Additionally, a thorough cleaning should be conducted at least once a day, or more frequently if the slicer is used heavily.
Can I sharpen the blade of my Hobart meat slicer myself?
Yes, you can sharpen the blade yourself if your slicer does not have a built-in sharpener. Follow the manufacturer’s instructions for manual sharpening or use a professional sharpening service for best results.
What should I do if the blade on my Hobart meat slicer is not cutting properly?
If the blade is not cutting properly, it may be dull or misaligned. Try sharpening the blade or adjusting its alignment according to the manufacturer’s instructions. If the issue persists, contact a qualified technician for further assistance.
